
What's inside
While international chest day often steals the spotlight in many lifters’ training schedules, there’s a whole other side to upper body training – literally!
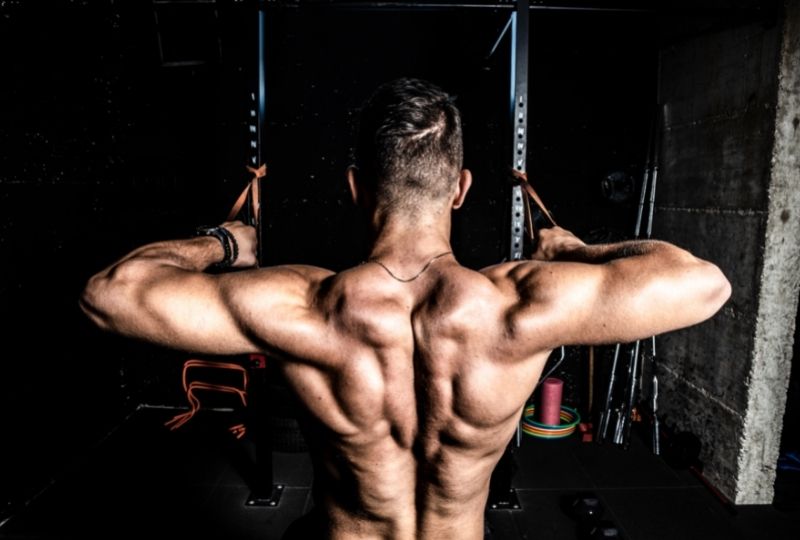
The muscles of the upper back are some of the biggest in the body, making them prime candidates for hypertrophy and strength building.
Another favorite muscle group of gym-goers is the biceps. The ‘guns’ aren’t just for show, however; they play an important supporting role in the movements of the back muscles.
This article provides an overview of the major muscle groups of the back and biceps. From there, we share the best exercises for increasing the size and strength of each.
We also provide several examples of effective back and bicep workouts for different training abilities and equipment needs.
This article is also filled with handy information on developing a defined back and biceps.
This includes training tips, warm-up routines, and benefits to training these muscles you may have overlooked.
Back and Bicep Muscle Anatomy
Related: Does Flexing Build Muscle?
The following are the major muscle groups of the back and biceps, starting with the outermost layer, the superficial muscles:
- Latissimus dorsi (large muscles running down either side of the back)
- Trapezius (diamond-shaped mid-back muscle, extending from neck to shoulders to spine)
- Posterior deltoid (rear shoulders)
- Teres major/minor (extend from shoulder blade to the upper arm)
- Biceps brachii (anterior arm muscles with a short and long head)
Underneath the muscles we see on the surface are many deep back muscles (and elbow flexors alongside the biceps):
- Rhomboid major/minor (retract the shoulder blades)
- Erector spinae group (extend the spine)
- Serratus posterior (superior and inferior portions)
- Neck extensor group
- Brachialis (prime mover of elbow flexion)
- Brachioradialis (helps flex the elbow with a pronated grip)
15 Best Back and Bicep Exercises for Overall Strength and Mass
See Also: Best Dumbbell Tricep Exercises
1. Deadlift
Some people have recently questioned the position of the deadlift among the top back exercises, claiming it’s more of a lower-body movement.
The fact can’t be denied, however, that the deadlift creates significant, large muscle-group contraction.
For instance, the spinal erectors, scapular stabilizers, and lats play pivotal deadlift roles by preventing spinal flexion and keeping the bar secure throughout the movement.
Even the biceps and brachioradialis are highly activated in gripping the bar during a deadlift, despite the absence of any elbow flexion in the exercise.
Fitness Equipment Required:
- Barbell
- Weight plates
- Dumbbells (variation)
- Chalk, lifting straps, or gloves (optional)
How-To Perform Exercise:
- Stand with the feet an appropriate distance apart, depending on which variation you’re performing.
- With the shins touching the bar, reach down and grab the bar with the desired grip width and style.
- Keep the neck and spine neutral, with the core engaged.
- Set the shoulder blades, grip the bar hard, and create tension in the entire body.
- Drive through the feet as you lift the bar to a standing position.
- Lock out at the top, hold for a brief moment, and control the bar to the starting position.
Pro Tips:
- Keep control throughout the movement; try not to bounce the bar at the bottom.
- Keep the bar close to your body for the entire lift to protect your back.
2. Pull-Up
Best Pull Up Video Explanation
Related: Pull Up Alternatives
If the deadlift is one of the ultimate open-chain back exercises, the pull-up is undoubtedly the closed-chain equivalent.
For those who haven’t heard these terms, this simply means moving an external weight through space or moving your body through space.
The pull-up creates back and bicep strength and stability that can be directly transferred to functional activities like climbing, throwing, rowing, or swimming.
Fitness Equipment Required:
- Pull up bar or other appropriate rail/ledge
- Olympic rings (variation)
- Chalk or gloves (optional)
How-To Perform Exercise:
- Grab the bar with your chosen grip style.
- Lift the feet off the floor to enter a dead hang.
- Retract and depress the shoulder blades and pull the belly button in.
- Drive the elbows down and back, pulling the chin over the bar.
- Hold at the top, then slowly control down to the starting position.
Pro Tips:
- Always try to perform your pull-ups with a full range of motion.
- Use a resistance band or assisted machine to build up to a bodyweight pull-up.
- Conversely, add a weight belt or hold a dumbbell between the feet for weighted pull-ups.
- Check out this article for a comprehensive guide to pull up alternatives to help you build your pull up strength.
3. Bent-Over Row
This beast of a back exercise hits just about every muscle mentioned above.
The spinal erectors, lats, traps, rear delts, and biceps are all recruited to stabilize the spine while performing this multi-joint pulling movement.
Fitness Equipment Required:
- Barbell
- Weight plates
- Dumbbells (variation)
- Chalk, lifting straps, or gloves (optional)
How-To Perform Exercise:
- Stand in front of the bar, with the feet shoulder width apart.
- Grip the bar with your hands at your preferred width and style.
- Start by deadlifting the bar to standing, then lower down until the bar is just below the knees.
- Keep the back straight and the head and neck neutral.
- Breathe out as you pull the bar into the abdomen.
- Squeeze the shoulder blades together at the top, and slowly control back to a straight arm position.
Pro Tips:
- Again, keep the bar close to your body and sit back into the heels to avoid tipping forward.
- Keep the chin slightly tucked to avoid neck strain.
- Using dumbbells will allow you to rotate the wrists throughout the movement.
4. T-Bar Row
Related: T-Bar Row Alternatives
This exercise deserves a place on this list for its ability to provide the same benefits as the bent-over row with a relatively low-risk profile.
Having one end of the bar anchored makes the T-bar row a slightly less advanced (and perhaps intimidating) alternative to the classic bent row.
Fitness Equipment Required:
- Barbell
- Weight plates
- Neutral grip handle
- Landmine attachment
- T-bar row machine (variation)
How-To Perform Exercise:
- Stand with the feet on either side of the barbell, with the handle slid up to just behind the plate.
- Lean back into your heels and lift the weight off the ground, keeping your spine straight.
- Sit back slightly, keeping the torso tilted forward at the hips.
- Set the shoulder blades and breathe out as you row the handle into your lower chest.
- Hold at the top, then slowly control to the starting position.
Pro Tips:
- The T-bar row is a good alternative if you’re worried about performing the more advanced bent-over row.
- If you don’t have a landmine attachment, simply place the anchored end of the barbell in the hole of an Olympic weight plate.
- If you don’t have access to the equipment or find performing this move difficult, take a look at this list of T-bar row alternatives for some ideas.
5. Inverted Row
Related: What Are the Benefits of Hand Grip Exercises?
Another bodyweight behemoth, the inverted row is a must-include in any overall back and biceps program.
From its production of lumbar stability to shoulder girdle stabilization, the inverted row is another highly functional back and bicep exercise.
The ability to scale this exercise to any ability level is what earns it its place on this list.
Fitness Equipment Required:
- Bar that can be set at around waist height
- Sturdy table (variation)
- Suspension trainer straps (variation)
How-To Perform Exercise:
- Sit under the bar and set up with the right grip for you.
- Hold the bar and walk the feet forward until your body forms a straight line.
- Squeeze the bar and lift the hips, driving the heels into the floor.
- Lift your chest towards the bar, pulling your elbows back and down.
- Hold the chest to the bar at the top of the movement.
- Slowly return to the starting position.
Pro Tips:
- If you don’t have a bar, you can get creative to find ways to do this exercise anywhere – safely of course!
- Use suspension trainer straps or Olympic rings to allow freer wrist motion.
6. One-Arm Row
Related: Dumbbell Lat Exercises
The one-arm row has an important place in this list. Training unilaterally has multiple functions in a back and bicep workout.
By targeting the muscles of each side individually, the one-arm row helps reduce muscle asymmetries which can lead to injury.
It also helps improve performance in single-arm sports and activities, such as racquet or throwing sports.
Fitness Equipment Required:
- Dumbbell
- Flat bench or another stable surface
How-To Perform Exercise:
- Place one knee onto a flat bench, with the hand resting on the bench just in front of the knee.
- For the no-bench version, stand with one foot forward and rest the hand on the thigh.
- Hold the dumbbell in your working hand, arm hanging straight down, and brace and straighten the back.
- Engage the muscles of the lower body and core, and breathe out as you pull the weight up to the side ribs.
- Slowly control the weight down until the arm is fully extended in the starting position.
Pro Tips:
- If you have tight groin muscles or don’t have an exercise bench, you can also perform this with the feet square and the support hand on a stable surface.
- Allow the lats to get a good stretch at the bottom of this movement, but keep the core engaged to avoid excessive twisting of the lower back.
7. Lat Pulldown
The lat pulldown is almost always part of any beginner gym program, and for good reason.
This exercise allows more controlled stimulation of the lats and biceps without the overall difficulty of an exercise like the pull-up.
The lat pulldown is also useful for athletes such as basketball players, gymnasts, and swimmers.
There are also many variations of the lat pulldown, making it accessible for most people, with or without expensive equipment.
We also have a lat pulldown alternative guide for those who don’t have access to this exercise machine.
Fitness Equipment Required:
- Lat pulldown machine
- Resistance band (variation)
How-To Perform Exercise:
- Set the seat and knee pad so you can sit comfortably with the hips and knees bent at 90 degrees.
- Grip the handle at the desired width with either an overhand or underhand grip, and sit down on the seat with the knees secured under the pad.
- Lean back slightly and lift the chest high, setting the shoulder blades.
- Engage the lats as you pull the bar down to your collar bones.
- Squeeze the upper back hard and hold briefly before controlling back to the starting position.
Pro Tips:
- Anchor a resistance band to a secure high point to perform a home variation of this exercise.
- Avoid hunching forward or trying to cheat the bar down – always keep the chest lifted.
8. Seated Cable Row
The cable row is an excellent horizontal pull companion to the lat pulldown exercise.
The seated variation of the row provides a three-point support base (the two feet and the butt), putting lower shear and compression forces through the lower back.
Fitness Equipment Required:
- Seated cable row machine
- Resistance band (variation)
How-To Perform Exercise:
- Sit at the front of the seat and grab the handle to take up the slack.
- Slide back and place your feet on the support platform.
- Extend the legs straight without locking the knees out, and sit tall with a straight back.
- Starting with the arms fully extended, retract the shoulder blades before you pull the handle toward your upper abs.
- Control the weight to the starting position.
Pro Tips:
- Anchor a resistance band and use a seat or ball to perform this exercise at home.
- Avoid leaning back and forward excessively during this exercise to protect the lumbar spine.
9. Shrug
Now it’s time to focus on the upper portion of the trapezius muscle with the shrug.
This is part of the back musculature that can make a marked difference to your physique, even when viewed from the front.
The shrug is an exercise that creates the highest level of activation in the upper traps, making it an easy inclusion on this list.
Fitness Equipment Required:
- Barbell
- Weight plates
- Dumbbells (variation)
- Resistance band (variation)
- Chalk or gloves (optional)
How-To Perform Exercise:
- Unrack or perform a deadlift movement to get to a standing position with the bar held in front of the thighs.
- Engage the glutes as you take a very slight lean forwards.
- Pull the tips of your shoulders toward your ears.
- Hold at the top, and slowly lower until the arms are hanging straight and you feel a stretch in the traps.
Pro Tips:
- Keep the head still during this exercise to protect the neck.
- Lift the straight up and down, avoid circular shoulder movements as this can lead to shoulder strain and injury.
10. Straight Arm Pulldown
So far, most of the exercises working the lats have been compound, multi-joint movements.
The straight arm pulldown isolates the lats, allowing you to create a strong mind-muscle connection.
This exercise is pure shoulder extension and follows the precise movement path the lats are created for.
Fitness Equipment Required:
- Cable machine
- Straight bar handle
- Resistance band (variation)
How-To Perform Exercise:
- Stand in front of the cable machine with the handle set high.
- Adopt a slight forward lean at the hips to create a slight stretch in the lats.
- Flare the lats and pull the bar in an arc down toward your thighs.
- Pull the handle back and into your body, squeezing the lats hard.
- Slowly control back to the starting position, keeping tension on the muscle.
Pro Tips:
- Keep a consistent angle at the elbow, try not to let the triceps do the work by extending the elbow.
- Anchor a resistance band to perform this exercise at home.
11. Dumbbell Pullover
Related: Lower Back Exercises With Dumbbells
While the previous exercise is great for contracting the lats in a contracted position, this alternative creates great tension under stretch.
While also recruiting other muscles like the pecs and triceps, there are few exercises that can create such a good stretch on the lats.
Fitness Equipment Required:
- Dumbbell
- Bench
- Bosu ball (variation)
How-To Perform Exercise:
- Lay along a weight bench with the feet flat on the floor.
- Holding a barbell at the chest, use a diamond grip with the palms facing up to lift the weight straight up.
- Keeping the elbows locked, extend the shoulders overhead, stretching the weight toward the ground behind you.
- Keep the muscles engaged as you feel a good stretch at the bottom, then contract back up to the starting position.
Pro Tips:
- Perform this exercise across the bench to allow an even greater stretch by dropping the hips.
- You have to focus on using the lats throughout the movement, rather than the pecs and triceps.
- Again, don’t let the elbows bend, as this will cause the triceps to take up some of the tension.
12. Barbell Curl
The first biceps exercise on this list has to be the barbell curl.
This is a staple arm exercise that allows you to lift heavier loads in a curling movement, as the bar provides stability through the trunk.
Fitness Equipment Required:
- Barbell
- Weight plates
- EZ bar (variation)
How-To Perform Exercise:
- Stand with the feet shoulder-width apart, holding the barbell in front with a supinated grip.
- Pull the shoulders and elbows back, engage the core, and keep the low back neutral.
- Breathe out as you curl the bar up to the chest.
- Use the biceps to resist the bar as you slowly lower to the starting position.
Pro Tips:
- Try to avoid letting the elbows come forward excessively during the movement.
- An EZ bar may be more comfortable on your wrists and elbows depending on your preference.
13. Hammer Curl
After targeting the biceps with some heavy barbell work, it’s time to call in their lesser-known brother, the brachialis.
This muscle is actually the prime mover in elbow flexion and is placed in a more mechanically advantageous position with the hammer, or neutral, grip.
Fitness Equipment Required:
- Dumbbells
- Resistance band (variation)
How-To Perform Exercise:
- Adopt the same stance as the barbell curl above, but with the dumbbells held at either side, palms facing inward.
- Keeping an upright posture, curl the weights toward your shoulders, keeping a neutral grip.
- Squeeze at the top and slowly lower down to the starting position.
Pro Tips:
- You can perform this exercise bilaterally, or by alternating sides. Try both and see what works best for you.
- Avoid swinging or leaning the body throughout the movement; focus on engaging the biceps rather than ego lifting.
14. Incline Curl
Like the dumbbell pullover above, the role of the incline curl is to create tension in the muscle in an elongated position.
In fact, incline curls are the preferred exercise to create the most neuromuscular activity in the biceps throughout the entire range of motion.
Fitness Equipment Required:
- Dumbbells
- Adjustable bench
How-To Perform Exercise:
- Set the bench up at somewhere between a 45-75 degree angle.
- Lean back into the bench, holding the dumbbells at either side, palms facing forward.
- Start by engaging the triceps to fully lock the arms straight, getting a good stretch of the biceps.
- Press the back flat onto the bench and squeeze the biceps to curl the weight up toward the shoulders.
- Resist the weight down to the starting position, again getting a full stretch at the bottom.
Pro Tips:
- If possible, lift the bench seat to an incline to avoid sliding.
- Start with a gentler angle if you have concerns with your shoulders.
15. Reverse Curl
Finally, we have the reverse grip curl. This move is a great finishing move for the biceps, also hitting the brachioradialis (forearm), brachialis (hidden bicep between the long and short bicep head) and other forearm extensor muscles.
This exercise can be done with different pieces of equipment. If you are using dumbbells, you might even want to try the Zottman curl, combining a regular and reverse curl.
Fitness Equipment Required:
- Dumbbells
- Barbell (variation)
- EZ bar (variation)
How-To Perform Exercise:
- Stand with good posture and the feet shoulder-width apart, with the dumbbells in front of the thighs, palms facing toward you.
- Engage the glutes and core, and keep tension in the entire body.
- Keep the elbows tucked into the ribs and the wrists straight as you curl the weights up.
- Slowly lower down to the starting position.
Pro Tips:
- Avoid overextending the wrists (or letting them hang down) during this exercise.
- Using dumbbells or an EZ bar will allow for a slightly more comfortable grip for some people.
The Best Back and Bicep Workout Routines for Muscle Growth and Strength
Related: Muscle Gain Workout Plan With PDF
These example routines combine the awesome exercises listed above in some effective back and bicep workouts.
Combine these with the split schedules and warm-up routines below to blow up your back and bicep muscles.
Beginner Back and Bicep Workout
| Workout 1 | Workout 2 |
| Cable row 3×12 | One arm row 3×12 |
| Lat pulldown 3×12 | Underhand lat pulldown 3×12 |
| Straight arm pushdown 3×12 | Dumbbell pullover 3×12 |
| EZ bar curl 3×12 | Hammer curl 3×12 |
Advanced Back and Bicep Workout
| Workout 1 | Workout 2 |
| Barbell deadlift 4×8 | Weighted pull up 3xMAX |
| Bodyweight chin ups 3xMAX | Bent over row 4×8 |
| One arm row 3×12 | Inverted row 3×12 |
| Barbell shrug 3×12 | Straight arm pulldown 3×12 |
| Incline curl 3×12 | Barbell curl 3×12 |
| Hammer curl 3×12 | Reverse curl 3×12 |
Back and Bicep Dumbbell Workout
| Bent over row 3×12 |
| Dumbbell pullover 3×12 |
| One arm row 3×12 |
| Dumbbell shrug 3×12 |
| Hammer curl 3×12 |
Back and Bicep Workout at Home
| Pull up 3xMAX |
| Door/table inverted row 3×12 |
| Bent over row resistance band / towel 3×12 |
| Pullover resistance band / towel 3×12 |
| Bicep curl resistance band / self-resisted 3×12 |
Best Back and Bicep Workout Split Routine
Related: Top 10 Middle Back Exercises
The back and bicep workouts above can fit into a broader gym program in several ways.
First, they could serve as the pull day in a push/pull/legs 3-day split. For a comprehensive breakdown of 3 day split workouts, try our recent article on the subject.
For example:
- Monday: Push workout
- Tuesday: Pull workout (choose routine above)
- Wednesday: Legs workout
- Thursday: Push workout
- Friday: Pull workout (choose routine above)
- Saturday: Legs workout
- Sunday: Rest
Alternatively, they can make up the back day in a traditional 5-day bodybuilding split.
Even if you have an exclusive arm day, it’s fine to have one or two biceps exercises to finish off your back workout.
Stretching and Warm-Up Routine Before Back and Bicep Workout
Related: Do You Have Bad Bicep Genetics?
The following routine can be used before any of the back and bicep sessions above to adequately warm up the muscles, joints, and connective tissues.
- Wrist circles: 10x each direction
- Shoulder circles: 10x forward and backward
- Scapular retraction squeezes: 10x with 2-second hold
- Warm-up sets: 2-3 sets of first exercise at submaximal weight, building up to first working set
Following your back and bicep workout, try these stretches to release the target muscles and promote recovery:
- Dead hang from bar
- Downward facing puppy stretch
- Thread the needle
- Standing forward fold
- Seated side bends
- Supine lying twist
Perform each of these stretches for one to three sets of 20-30 seconds, on both sides where applicable.
My Fundamental Training Tips When Training Back and Biceps
Related: Top 10 Chest Stretches
Set the scapulae.
Practicing retracting and depressing the shoulder blades during back exercises is critical for proper back exercise technique.
Not only does this help the muscles perform their proper function, it prevents you from developing inefficient – and potentially harmful – biomechanical movement patterns.
Get a grip.
Often a limiting factor for pulling exercises, bodyweight or otherwise, is grip strength.
The exercises in this article will help strengthen the muscles of the anterior and posterior forearm, giving you a stronger grip and a more well-rounded physique.
A more powerful grip will also translate into other areas of your training, making you stronger overall.
Spine safety.
It’s so important to maintain the natural curvature of the spine, particularly during movements that require forward trunk flexion.
Stay safe and keep the loads manageable to keep your back performing optimally for the long term.
Amazing Benefits to Building a Strong Back and Biceps
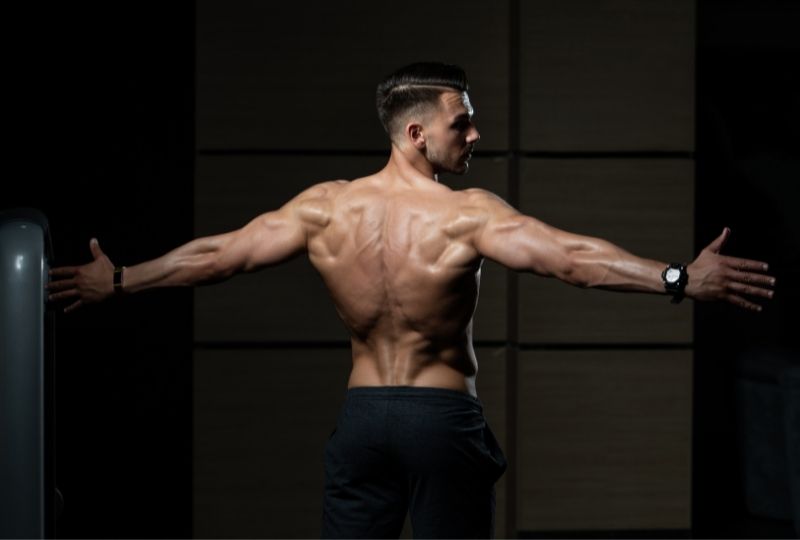
Build the V-Taper
One of the main requirements of an aesthetic physique is the V-taper, created by having wide shoulders and lats with a narrow waist.
Exercises in this guide that help build the lats will help create that broad-shouldered look, giving you a more muscular appearance.
Avoid the Paper Phenomenon
It’s no good looking like an upside-down pyramid from the front if you disappear when turning side-on!
Building up the muscles of your back helps create a thicker, more muscular appearance when viewed from the side.
Fill Out the Sleeves
Of course, one of the main reasons to train the biceps is to have impressive-looking arms.
The biceps are one of the most common muscles people want to grow, and for good reason – they’re on display more than many other muscle groups.
Perfect Posture
Another benefit of training the back muscles is that several of these muscles help improve your posture.
By pulling the shoulder blades back, these exercises help undo the common rounded postures we see today.
Improved posture has the added benefit of making you look more muscular overall.
Prevent Back Pain
Strengthening the muscles of the back is a great way to bulletproof your body.
Back pain is one of the most common musculoskeletal injuries, and building back strength and function using the above exercises is a great way to avoid it.
Maintain a Balanced Physique
Finally, it’s simply a good idea to train your back and biceps to counterbalance the more commonly trained ‘mirror muscles’.
Just because you can’t see yourself from the back, doesn’t mean everyone else can’t either!
Get back to it!
What do you think of our selections? We hope this article provided some useful exercises, workouts, and tips to train your back and biceps.
Let us know your favorite exercises routines for a big, muscular back and arms in the comments!
If you know anyone who needs ideas for a new back or bicep program, don’t forget to share this article with them, too.
Meta description: Stop your search for the ultimate back and bicep workout! This article covers the best exercises, routines, and workout splits for the back and biceps.